They were absolutely gorgeous and although I danced on them a couple of times, it was a matter of urgency to get some tips on....you can imagine satin on wooden floors!
Having scoured the internet, I couldn't find any I liked and sadly no tutorials either...so....I decided to go with the flow and make it up as I went along! Most unlike me who needs a pattern for everything!
I decided to use embroidery floss, this one to be exact......

and a 2.5mm crochet hook.

In true 'ME'-style, I was so intent on getting the correct shape for my shoe that I forgot to write down the numbers of stitches...but apart from the chain and joining with a slip stitch, my only other stitch was a Treble (UK terms) for the main tip and Double (UK terms) for the flap to the sole....all will become clearer....!

It looks like I've chained 7. 4 to work in and a chain of 3 to lift me from the chain to working the trebles.

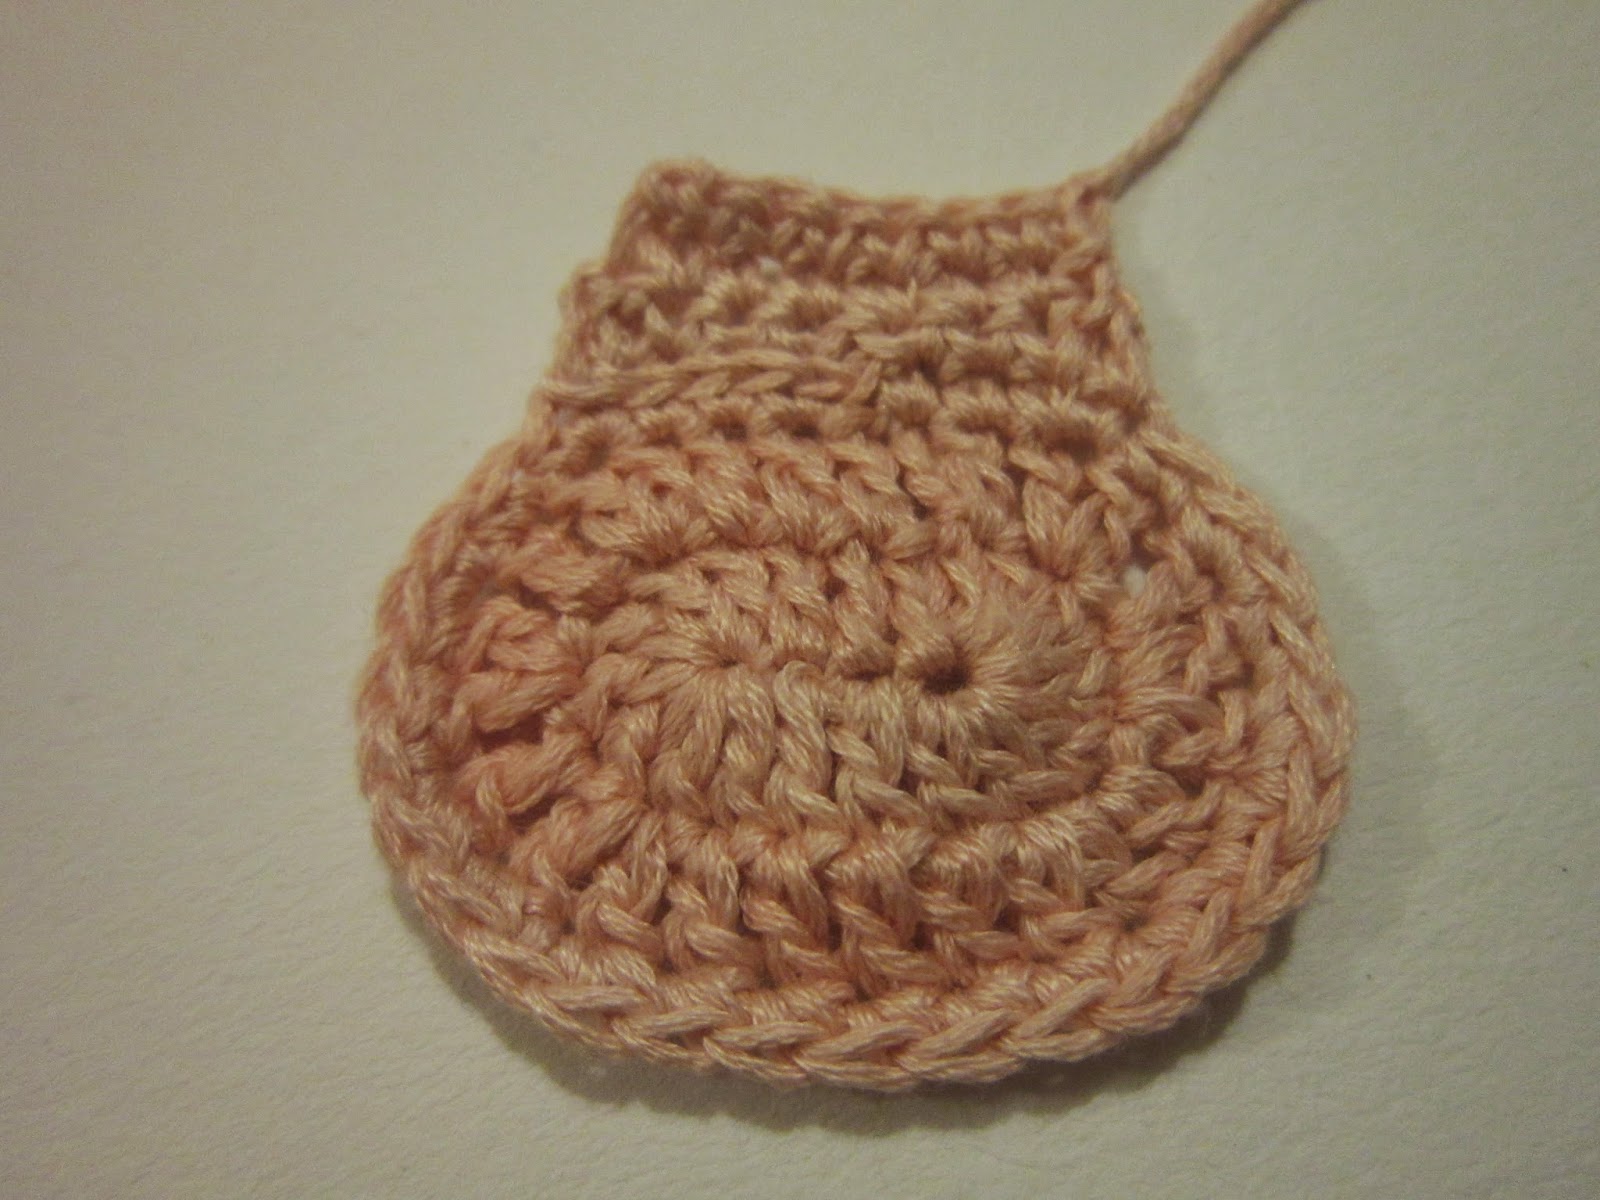
It looks like I've worked my 3 ch and 3 more trebles into that forst stitch, then a treble in the next 2 stitches.

On this photo (above) I have definitely worked the 3ch and 3 tr into the 4th chain from the end, 1tr into the next 2 chains and in the chain next to the tail, 7tr, then 1tr in the other side of the middle 2 chains and 3tr onto the end joining my 3ch with a slip stitch.

I've then come up to the next layer or round by ch3, 1tr into each stitch EXCEPT on that very middle stitch at each end where (to keep it flat) it looks like I've worked 3tr.

This picture is quite clear so use that as a guide for shape and numbers of stitches. I've finished that round by slip stitching into the top of my 3ch.
That is the main part of the tip covered and you may wish to stop there, however I now need to work a small 'flap' piece to go under the tip towards the sole of my shoe, like this.....

Here is where I made a single chain to lift me up to the next layer and it looks like I've them made 8 doubles. Make as many as you need to keep your work flat and give you a nice gentle shape from the tip up onto the flap. I then turned my work and worked doubles back along that row. Like this....
I then sewed my tail back along through the doubles to secure it.

Then I used some PVA glue to stick the tip in place on my shoe and hand stitched it into place around the edge with my thread doubled. Just sew until you feel it is secure.

Sorry about the quality of this picture, but as you can see the top of my shoe or upper, is not covered at all by the tip. It also looks neat and I can say functions beautifully! I feel very secure en pointe and I think it finished the shoe to perfection.
Every little girls dream...her most perfect pointe shoes.
I hope that helps someone, sorry there is no pattern as such, but if you do have a question, please leave a comment and I'll get back to you,
take care
Nora
xxx
No comments:
Post a Comment
Thanks for dropping by, please don't leave without commenting as it's nice to know you were here x