Tuesday 16 July 2013

Rice bag

Ages ago I made myself a rice bag for a troublesome shoulder that was disturbing my sleep. It's one of those ones that you pop in the microwave to heat and it lasts a good 1-2 hours. It moulds perfectly around shoulders and necks in a way that a hot water bottle simply can't.

As my Teenage Daughter suffered with neck and shoulder ache due to a curvature of the spine, I found my rice bag missing...well, I found my rice bag in her room!

I had a bit of a sort out which I told you about here and found a rice bag outer that I had cut out, but that was it. I don't use any specific measurements, I've made a hand warmer size and plan to make a bigger one before the winter for my feet!

I decided to quickly sew it together by sewing the 2 long sides and then finish the opening by turning and sewing and turning and sewing again.

 
  Turn it through to the correct side and push the corners out with something blunt.

 
I also make an inner that contains the rice, being removable, it means you can wash the outer cover. I used muslin for my liner and roughly cut a rectangle slightly smaller then the outer bag. It was folded at the side so I stitched bottom, side and along the top just a short way to allow myself room to fill with rice.

 
I turned it the right way round, filled about half way with rice, folded the un-sewn top in and ran a stitch across it.

 
Popped it inside the outer and..... TA-daaah!....
 
 
If you want a closure (my own does but this one for Teenage Daughter doesn't) you could use velcro or make a button-hole and add a button, totally down to what you want to do to it and how fancy you want to get! Have fun!


Whilst I was making this, I realised how safe this is for children...no leaking or burst hot water bottles....so my brain is ticking with Rice Mice that you can take to bed and cuddle! Wouldn't that make a lovely, cuddly, warm toy friend to take to bed?

I'll keep working on that one and catch up with you soon.

Until then, take care,
love Nora
xxxx

Monday 15 July 2013

Tie-backs...what more can I say!

It was so hot today, no air, no breeze.... don't get me wrong! It beats the rain by miles! BUT, it was too hot to do anything outside...SO....I decided a clear up of my side of the bedroom (my sewing table!) was long overdue!

Polish in hand I cleared the decks and the dust! Oh! It was shameful!

The plus side was that I found a tissue holder my daughter had started but not got to the end of, a cut out and pinned rice bag, the t-shirt and material to make another one of these for my God-Daughter (aka Tiny Angel)......

 
AND finally (not started at all) the old tie-backs for the newly decorated Tiny Angel bedroom which I shall use as the templates for new ones made from the remains of the sheet left over from the bunting (also completed the other night!)
 
It has been all go here! I wanted to walk you through my tie-back journey....never made these before!

I started by using the old tiebacks to draw around, I drew closed to the edge so that when I cut I added extra for the seam allowance, I could also have drawn it with a seam allowance, either way works.


 I then cut out my template.........


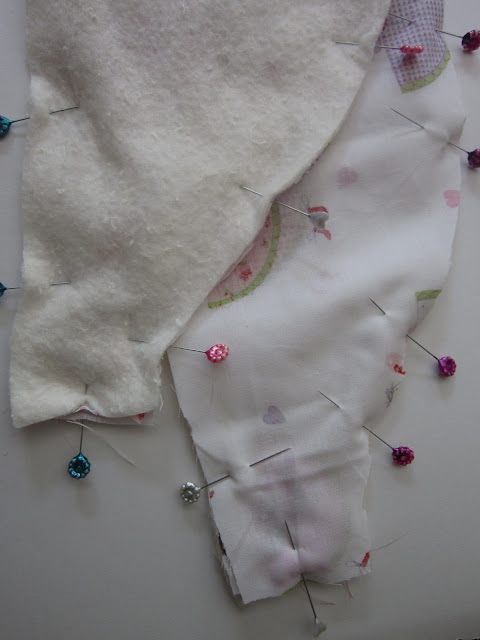
 ....laid it on the fabric, pinned it and cut! I did the same with some wadding to add a bit of umpf to the thin fabric. So that's 4 cut in main fabric and 2 in wadding.


I then took the remaining bias binding left over from the bunting and cut 4, 12cm lengths......
 
 
which I folded in half and stitched like this....
 
(sorry it's sideways...couldn't get the wotsit to twist it round for you!  But you get it...right?)
 
Here we are..........
 

I laid the binding loops on the correct side of the fabric each end of 2 of the main fabric pieces, pinned them and sewed across the ends just to hold them in place.

 
THEN, lay down the wadding, on top of that a piece of the fabric correct way up and one correct side down, make sure that just one of those has the binding loops.

 
Pin and sew all round except for a section about 10cm long (for turning). You might want to go back and forth to reinforce the stitching either side of the opening.
 
 
Iron the fabric side and iron back the opening so the when it is turned the right side round it will be easier to sew the opening closed. Turn the correct way round and use something blunt to push the corners out, iron again. Sew the opening closed with small slip stitches. Repeat with the other pieces and there are your 2 tiebacks.
 
I managed to place my templates so that the fairies were flying across the tie-backs and also so the my slip stitches, although neat, were placed on the section which will be behind the curtains.
 
So want to see?  OK then....
 
TA-dahh.........!


I hope Tiny Angel and her Mummy like them...I'm hoping they'll send me a photo of them so that I can share with you, until then...see ya!
Love
Nora
xxxx

Sunday 7 July 2013

Cheers Everyone, I had a Jolly Good Time!

This was how Joy said goodbye and wanted to be remembered, so this is not a sad post but a 'Joy'ful one!

Joy was ....wait for it, it's complicated....the step-mother of my husbands first wife.  Phew...there we are.

Sadly she moved on to pastures new a few weeks ago sent on her way in a beautiful bamboo basket and to the sounds of Glenn Millers Big Band music...go girl!

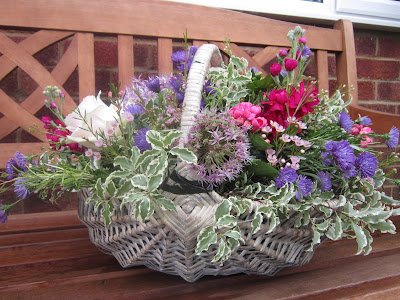
Joy lived life to the full and her big passion was her garden, with this in mind I wanted to show you the beautiful arrangement put together by Stems of Southwater, our local florist.

The brief was garden flowers in a basket that didn't look to funeral-ly and sombre.

So here it is........................

 
Don't you think that basket looks like a trug?

 
Alliums, roses....

 
Just the right colours....

 
It was so gorgeous I just had to share.
 
If I find a nice picture of Joy I shall add it later.
 
Life has been busy with this and that, I have been creating in between school runs, pre-school runs, work, rellies and all the usual hubbub of life, but I promise I will stick my head up soon with some progress reports and possibly a Ta-Dah!
 
Until then, Blessings,
 
Nora
xx