Friday 31 August 2012

Holiday Hexies.....another project!

This was a project I took on holiday with me.

It started with inspiration from a Ballet Friend who made a Hex Bag for her Ballet garb.  When she arrived at class with it, I fell in love and knew that I wanted to hand piece some hex-i-love!

I haven't hand pieced hexies since I was about 8 and my Nanny unearthed a REALLY old book (you know the sort, wonderfully musty smelling, small font with ink drawings (yes, printed before the dawn of photos in books!))

She found me some fabric from household and dress-making projects and reached into the sideboard for her sewing tin, round, yellow and red roses on a black background with a gold lid......always full of elastic, poppers, a selection of needles, buttons and 'Sylko' cotton on wooden bobbins (that when she'd used the cotton I threaded onto a shoelace as a baby and my Granddad made into French Knitting dollies as I grew up!)

We gathered some used envelopes (re-used for writing notes and shopping lists on) and cut hexagons.

She hex-ed along with me and I made a tiny  (7 hexagons each side) pincushion.......... ah......memories!

Thank you Nanny for all the craft seeds you planted in our wonderful years together....x

My Ballet Friend kindly photocopied her instructions and gave me a stash of ready cut hexagons, plus two with fabric tacked on and ready to go!

I went home inspired and immediately got out the fabric scraps, they included pieces of offcuts left after making my old school summer dresses, a couple of dresses I made Tiddly Toes, our Christmas tree skirt, Advent calendar, Teenage Daughters 'LOVE' cushion'Charm'ing-birdie, Mini Quilts, quilted cushion cover and a whole lot more .

Not wanting to ruin my friends templates I cut more hexagons and snipped a diamond from the centre of each one...

 
through this whole you pin your paper to your fabric, like this......
 
 
....and tack the fabric over the paper BUT....don't sew the paper!
 
 
...this means that when you've finished sewing you can remove the papers without having to unpick all the tacking....so much faster!
 
I laid out my hexies into a pleasing pattern and took a photo of them so that I could remember how they were placed......


.....good job really as Tiddly Toes 'tidied up' for me and they ended up looking like this.........


Before we went away I put together a few hexies.....and my goodness it was addictive!  I had to stop myself so that I didn't get too far ahead and have no project left to take!

On holiday, I sat in bed most evenings and did a spot of sewing whilst watching the Olympics.

Sadly we had a couple of rainy days, but with the Blessing of a games room, the children were happy to play there and I was able to sit and watch (and sometimes join in) and get a little sewing done too.

I basically followed Ballet Friends instructions which I found were in Cath Kidstons 'SEW', which had been given to my daughter for her birthday......


...... but instead of making a bag with handles (the knitting bag), I re-jigged my hexies into a tube (by joining the 2 sides) and interwove the hexies along the base so that it had my lovely hexies as whole as possible (as opposed to just machine sewing a straight base and sides).

It did mean I was left with finding a solution to hexagon corners.....but I did this......


and it worked!

I got this all finished whilst on holiday and had to put it to one side ready for the lining and drawstring bit on the sewing machine at home.


I found a half made skirt that I no longer, liked or wanted (you can see why, take a look at the colour!!)  I used half of it to make the lining.

I cut it to size by laying the outer bag on the top of the fabric and cutting 1cm bigger on 3 sides and about 9cm bigger on the top edge (sufficient to give me a 'collar' on the top of my bag.....you'll see why later) plus seam allowance.

I sewed the sides and base of my lining and slipped the patchwork outer into the inner that now resembles a tube and sewed the 2 together like this............

 
I then turned it right way round, it gave me a 'collar' of lining material about 4 cm above the patchwork......


....... onto this I sewed 2 lines of stitching around 1cm from the very top and 1 cm above the patchwork, I double stitched near to one seam so that when I opened the side seam with my seam ripper that it didn't unravel the whole side seam.


Into this gap I fed some cotton herringbone webbing and leading it with a safety pin threaded it round the channel.....


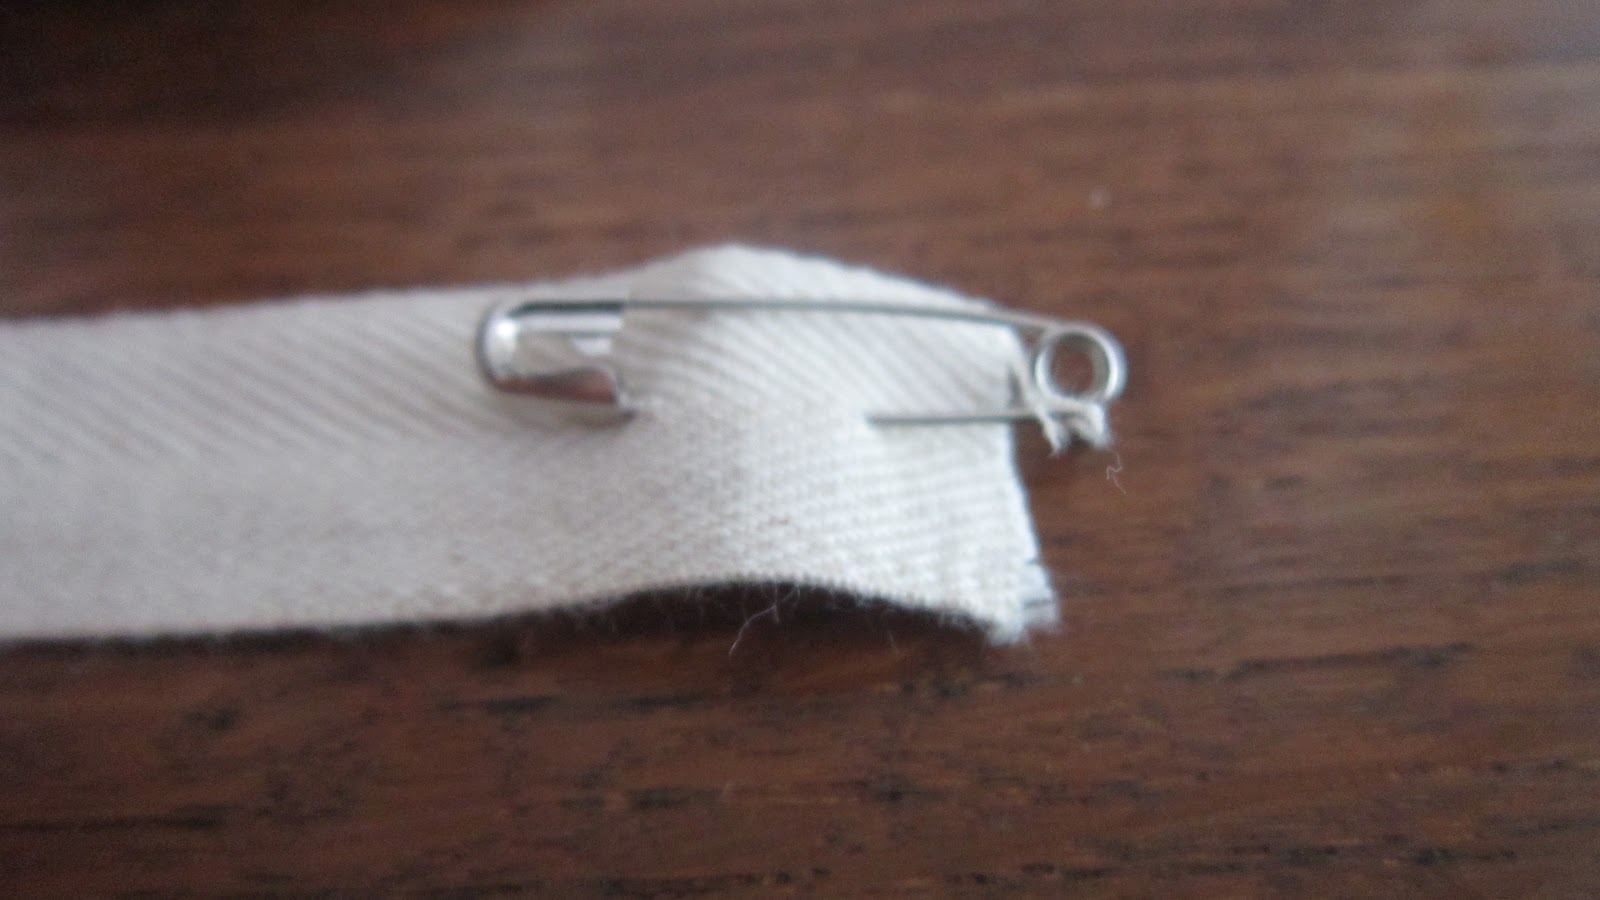
 Before tying a knot I raided Tiddly Toes bead box and threaded on a large red bead....done!

 
So stupidly proud of this.

It reminds me of my Nanny, my holiday, friendships made through shared interests, the peace and beauty of Ballet....it just makes me smile every time I look at it.

Here it is....

OK, TA-dah....................

 
I shall enjoy using this every week for my Ballet class.
 
I'm off for a little jaunt this weekend....only about 20 minutes down the road....BUT, a weekend in Flossie-van is to be treasured!  The weather looks like it's going to be good and I can take a little project to work on!
 
Hope you have a fabulous weekend,
Nora
xx

Sunday 26 August 2012

Seabass...mmmm!

I was wandering through town the other day, running errands and shopping....you know how it is.  I had to post a letter to our accountant....I popped it through his door and discovered a wonderful thing!

No, not a tax saving but a fishmonger!

Apparently he's been there a couple of months, but I don't go by there often.

I had a look and decided upon tuna steaks for the BBQ (wish were absolutely delicious) and a good sized Seabass.

Last night Teenage Daughter was and a sleepover, so The Hubs and I decided to come up with something for the Seabass.

We poured over some recipe books and decided on a bit of a mix of 3 different recipes!

He finely sliced green beans, cucumber and carrots and I made a marinade like this....

3 tablespoons of soy sauce, 1 tablespoon of sherry (should have been dry but I only had sweet!), 2 spring onions finely sliced, a teaspoon of fresh ginger (we keep ours frozen and shave off thin slices with a sharp knife, so it's easy to measure a teaspoon like this!) , 1 clove of garlic and 2 teaspoons of cornflower.

I laid the fish in some baking paper and then on some foil, mixed together the marinade and used it to stuff and pour over the fish.

At this point I decided it looked R-E-A-L-L-Y good!

So in order to share with you....I got the camera out for a photo shoot!

This is the fish with marinade in and over it and with the veg....we,, just sort of dumped on top really!

 
I then tucked in the two ends of the paper (head and tail) and wrapped the other bits across the body, I did the same with the foil so that it held its' shape and the juices didn't escape, like this..........

 
I plonked that little parcel into the steamer for 20 minutes and what came out smelled delicious! Unfortunately, despite being cooked, it didn't look very different!  You can just see the sauce (thickened whilst cooking by adding the cornflour) at the right hand side of the pic....tail end!

 
It was such a quick and easy recipe and one, I bet, that would work if you popped it on the BBQ or in the oven!
 
We had it with Couscous (75g per person with 115ml of water per 75g, pour on the boiling water, cover and leave for around 6 minutes, stir and eat!) and salad....mmmmmm!
 
Total preparation and cooking 30 minutes!
 
The clearing up was easy too!  Knife, fork and plate each, 1 bowl for couscous, nothing for the fish and a knife and a couple of spoons for the veg, salad and marinade!  Now if that's not easy....?
 
So after our meal our kitchen looked like we'd been out to eat!  And the meal was so delicious, it tasted like we'd been out to eat!  Win, win.....*smiles*


I'll be back soon with some crochet and patchwork....until them....cheerio!

Nora xx

Friday 24 August 2012

Hanging Heart

I have been away for a fortnight to a wonderful barn in Suffolk called Wattisham Hall (Owl's End), it was FANTASTIC!

 
It isn't too far to travel (about 3 hours) but it just felt like a different world.

The barns are fabulously well equipped and to be greeted with the makings of tea and coffee with a pint of milk in the fridge AND a homemade chocolate cake!  What could be better after a long journey.

Watching the sun set from the hot tub in the evening and waking up to the ducks on the moat in the morning....it was torture....but I managed.....hahahahaha!

So that explains my absence from BlogLand and the lack of entry this month into the Pinaddicts Challenge.

However.....I did take a little project or 3 on holiday with me!

First up is a heart!  It was sent to my dear internet friend Michelle.....yes, that's right....we have never met, we became friends supporting each other through a facebook page called The FlyLady.  It was Michelle birthday on 18 August, so I took some cotton yarn on holiday with me to make a Heart hanging decoration.

You may remember back here, that my wonderful crew gave me some books on Mothering Sunday, one was this....

 
I really liked the big pale pink heart and thought that it would be quite easy to make two and crochet them together, stuff, embellish....you get the idea.


I started with 17 chain.....

 
....then I went on holiday and forgot to take any more photos!!!!!!!!!  Der!  But needless to say I followed the pattern and made 2 hearts.
 
To join them I matched wrong sides together and DC'd them together and included a chain of about 10 to make a hanging loop.  Before I completed the round I stuffed with toy stuffing and then closed, stitched in the end and attached a butterfly embellishment made using the pattern from Little Birdie Secrets.
 
I then parcelled it off to my dear friend Michelle (who received it 5 days later....not bad eh?)
 
So here is my Crocheted Hanging Heart debut..........
 
Ta-Daaaahh!...........
 
 
If you want to give this a go, the book is good, there are also loads of crocheted hearts here, many of which lead to tutorials....but for a good free pattern, these are my absolute favourites.........


.........the tutorial is at Fizule71 (you'll need a translator).
 
Back shortly with another make!
 
Nora xx